Manipulating Layers
Layers are the basic building blocks for creating designs in BuilderX.
Groups and Artboards are used in BuilderX to keep your content organized and they are also treated as layers in their own right. To add new layers to your artboard, click the Insert pop-up menu on the Toolbar or click the Text, Rect or Icon icon and choose your layer type.
This section shall describe the following manipulations:
- Adding Layers
- Moving Layers
- Resizing Layers
- Resizing Constraints
- Editing Layers
- Renaming Layers
Adding Layers
The easiest way to add a layer is to pick the rectangle shape from the Insert pop-up menu on the Toolbar. Select Rectangle(or press R). You will see the pointer change to the Draw Rectangle tool icon.
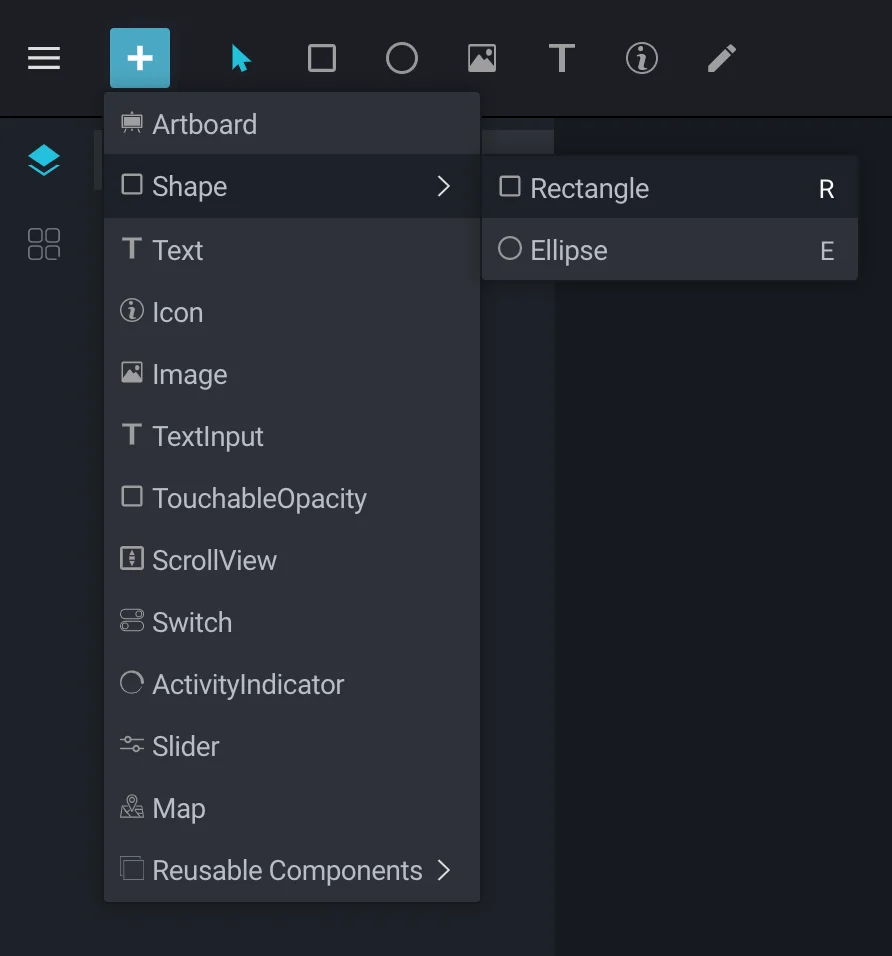
Now click anywhere on the Artboard and drag to insert your shape. When you release the pointer, the shape will be inserted and you can start manipulating it.
You can also click on the Artboard when your pointer tool is set to + sign and the pop-up will appear to enter the desired dimension of your layer. This is what the pop-up looks like:
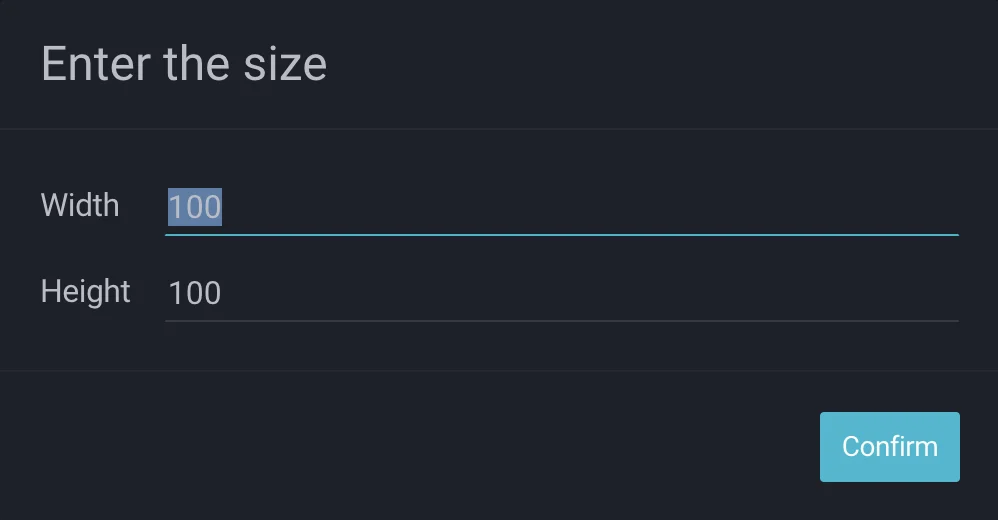
Providing the Width and Height will be automatically applied as the dimension of the inserted layer.
Moving Layers
You can move a selected layer by grabbing and moving it around with the pointer.
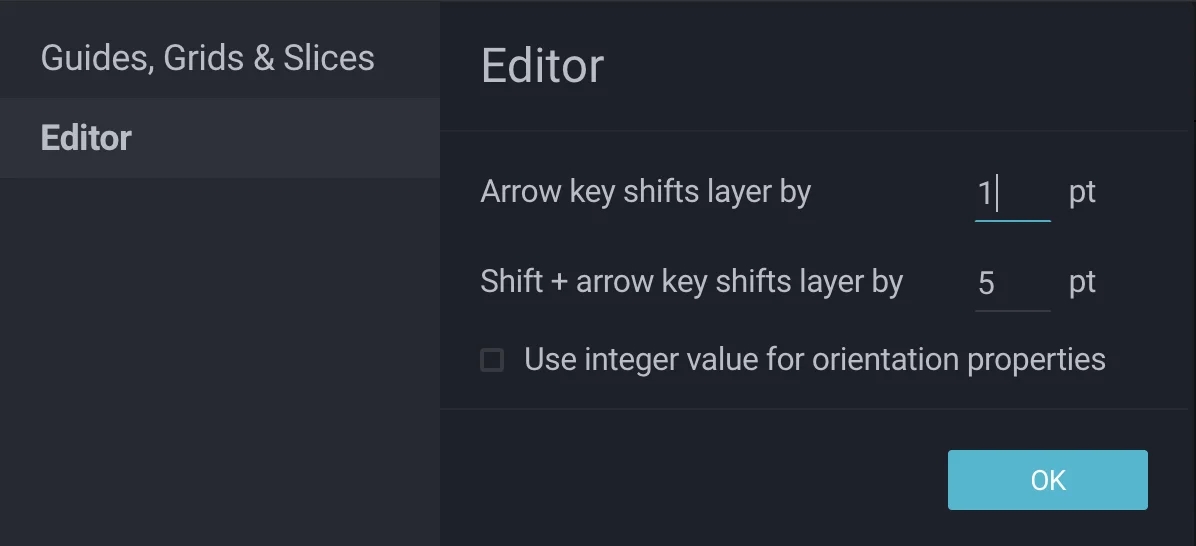
You can also move the layer by Selecting the Layer first followed by the arrow key strokes. Whenever you hit ↑ , ↓ , ← , → key, it will move your selected Layer by 1px on the Artboard.
Moreover, If you hit ↑ , ↓ , ← , → key while holding down the Shift key, It will move the selected layer by 5px by default.
To change the configurations for moving layers using arrow keys, You can go to Settings in Menu by following BuilderX > Preferences > Settings > Editor.
Moving Multiple Layers
You can move multiple layers by holding down the Shift key on the keyboard and clicking on another layer. If you hold Shift and click an already selected layer, it will be deselected.
Click-and-drag from an empty area of the Artboard to select everything that fits in the selection rectangle. Again, if you have Shift or the ⌘ (Ctrl for Windows) key pressed, it will extend your selection or deselect any already selected objects.
Once multiple layers are selected, you can follow the same steps as above to move these layers. BuilderX will consider the group of selected layers as a single layer for that instance and move it according to your requirement.
Resizing Layers
The eight handles don't just indicate selection; you can also use them to resize a layer. Grab any of the handles and drag them to resize that layer. If you also hold down the Shift key, it will resize the layer proportionally; keeping width and height at the same ratio.
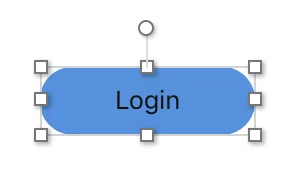
If you hold down the Option key (alt on Windows), the layer will resize from the middle instead of the opposite edge.
Resizing Constraints
Applying constraints to layers allows you to determine behaviour when you resize Components, Artboard, or the group that those layers are in. For example, you may want a layer to always stay in the middle of an Artboard or a particular group to stay in the top-left corner of a Component, no matter how tall or wide an object is. All this is possible with the resizing constraints that you can apply to your layers.
Applying Constraints
Constraints can be applied to any layer that lies inside an Artboard or group. When a child layer is selected, you can see the resizing constraints appear under the layer properties section in the Design Panel. Using this, you can specify a layer's behaviour when its parent is resized.
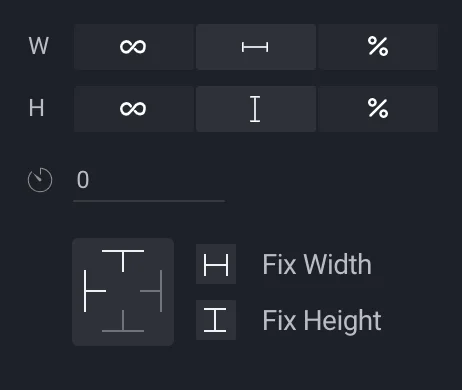
This section is split into two parts: On the left, you can define the edges each side of your layer should pin to. On the right, you can determine whether the size of your layer should stretch, or remain at a fixed height and/or width on resize.
When you apply a constraint to pin to the left edge of the layer, and another to the right edge, this means that the distances between the edges of the layer, and its parent will be respected. Because of these rules, the layer's width is flexible, meaning that that is what changes on resize.
In order for your content to adjust when you resize an Artboard, check the Adjust content on resize option in the Design Panel.
Examples
Below are some examples of common scenarios you may come across when applying resizing constraints to your layers, along with solutions on how to remedy them.
Fix to Edges
When dealing with common interface elements such as navigation and tab bars, you might want them to stretch horizontally, whilst maintaining a fixed height. This is particularly easy and only requires you to apply one constraint: Fix Height, so the height doesn't change if you resize the parent vertically.
Pin to Corner
Unlike the example above, where your layer is near the edges of its parent but is not hugging them, you'll need to pin it to the relevant edges so its distance does not change when you resize the parent group or Artboard. This is ideal for things like icons inside a navigation bar or a floating action button.
In BuilderX, the Icons and Texts don't have height and width. Rather, they have a size prop available. So, if you want to pin any Icon or Text in a corner or any other layers other than Icons or Text, you can do it as shown below.
Once you know what corner you want to have your layer 'pinned' to, click the constraints (eg, bottom, right) and then Fix Height and Width to stop layer from resizing.
Float in Place, and Fix Padding
If you want an icon to stay the same size when you resize its parent and for it to always remain in the center, just fix its Height & Width. This would affect only the padding around the layer upon resizing.
If you are looking for the opposite behavior, and want to fix the padding around your layer so it doesn't change on resize, pin the object on all four sides. A quick way to do this is to simply click the square in the middle of the resizing control and it'll be pinned to each edge.
Editing Layers
To edit a layer, select it and click the Design button present on the top-right of the Toolbar. What happens next depends on the kind of layer you've selected, so please refer to the appropriate section below.
- Icons
- Images
- Shapes
- Artboards
- Text
You can edit any layer from the Design Panel after selecting the layer.
Note: You can exit layer editing by clicking outside the layer or by pressing the Esc key.

Icons:
When an icon is selected, the Design Panel shows familiar options with some new ones. The Change Icon button allows you to replace the icon selected without changing its position on the artboard. The Styling option allows you to change the color, size as well as manage overflow for the icon.
Images:
Additional options for selected images on the artboard allow you to replace the image without changing its position on the artboard and gives you different resizing options such as Cover with the image, Stretch the image, Contain the image between constraints, Repeat images and Center align the image.
Shapes:
Additional options for selected shapes (Rectangle, Ellipse etc.) on the artboard allow you to Fill colours or gradients in the shape or change the Stroke of the shape and alter its width.
Artboards:
Artboards can be switched to the OS that you are building an app for through the Device option when an artboard is selected. The available choices are iOS, Android & Web with custom sizes and device selection. The Status Bar checkbox allows you to add a status bar to your artboard in dark or light content mode, as well as animate it to fade or slide.
Text:
When adding a text in your artboard, it is rendered as simple text in code. The Styling menu offers all basic text manipulation options. You can select the font family for your text in the first drop down menu under Styling. The second dropdown changes the font size & the third changes the font weight. You can also change the font colour by clicking on the rectangular button next to the dropdown menus.
Note: You can read more on these specific layers and how to perform operations on them under Special Operations.
Renaming Layers
You can rename any layer in BuilderX regardless of their context i.e. Group of Layers, Reusable Components etc.
Select the layer that you want to rename in the Layer list on the Layers & Components Panel and double click on it to show a pop-up to rename the layer.
Video Series
You can also check the video series covering operations in BuilderX.